Extracting FileVault 2 Keys with Volatility
This is a volatility plugin which can recover FileVault 2 Volume Master Keys from memory, based on a certain pattern. It has been briefly tested on OS X 10.9 – 10.11. Plugin on GitHub here.
This is a Volatility Framework plugin which is capable of recovering the Volume Master Keys for volumes protected with Apple’s FileVault 2 Full Volume Encryption (FVE) solution.
Update 2016-02-15: Just to confirm, this is not some scary vulnerability nor is it anything new – It is simply the way any Full Volume Encryption system works and most (E.G. Microsoft’s BitLocker, or the now-defunct Truecrypt and its forks) can have the same issue. For performance reasons it is generally necessary to keep the keys in memory, otherwise you end up with the additional overhead of having to constantly retrieve the key. This plugin simply makes it easier and adds that functionality to Volatility.
FileVault 2 has been included with OS X since version 10.6 and uses 128-bit XTS-AES Encryption to encrypt the entire volume (As opposed to the first version of FileVault which only encrypted a users home directory). As with any current FVE solution, FileVault 2 keeps the encryption keys in memory whilst operating.
The traditional method of locating encryption keys (for us mere mortals anyway) is to run aeskeyfind to attempt to locate the AES Key Schedules, which then may be used to unlock the drive. Finding the key this way provides a starting point for developing a Volatility plugin by providing a working key which may be used to hunt down the key in the memory image.
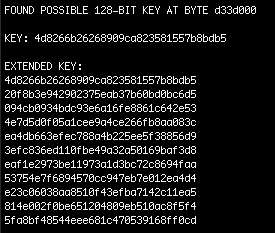
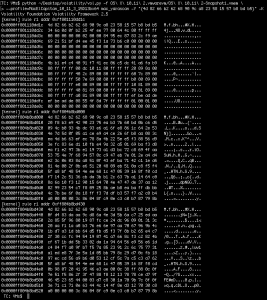
In this screenshot aeskeyfind has found the VMK (Note that it finds other potential AES keys as well, but I’ve omitted them for brevity). In our case here the VMK is 4d8266b26268909ca823581557b8bdb5
Running a yarascan for the key shows that the key is available at three different locations of kernel memory, and one of those locations contains the entire scheduled key.
With this information I started looking for a reliable method to locate the keys (perhaps searching for a particular symbol, or some kind of reference) but didn’t really have much luck. So, instead, I started looking for a pattern in memory locations or patterns in the data surrounding the keys that could be used to locate the keys in other memory images.
Comparing the memory of two separate OS X 10.11 VM’s shows some similarities in the memory images which may give us something to work with. The most apparent similarity is the repetition of the VMK at offset +0x430 from the initial key schedule location. This turns out to be useful knowledge when searching for the keys.
So what we know so far is:
- The VMK exists at 3 locations in kernel memory.
- The second location appears to be the key schedule, including the key at the start of the schedule.
- One of the locations is always located at the schedule location
+0x430 - The keys are located at a different offset after each boot (Which appears unrelated to ASLR – This is important, since if it was related we could find the ASLR shift value).
- The second + third locations are located in the same process memory submap, which is marked read-only.
- The second location (The location with the key schedule) is aligned with the start of a particular page.
Therefore, if we assume that:
- The key is located within the process memory of
kernel_task. - The key schedule is always aligned with the start of its page.
- The memory submap has read-only permissions (
r - -). - Another copy of the key may be found at
key +0x430
Then we can apply this general logic to find the key on any memory image:
- Get process maps of
kernel_task - Iterate through each
start_address - Compare value of
start_addresswith (start_address + 0x430) - If the value matches; then we have a key.
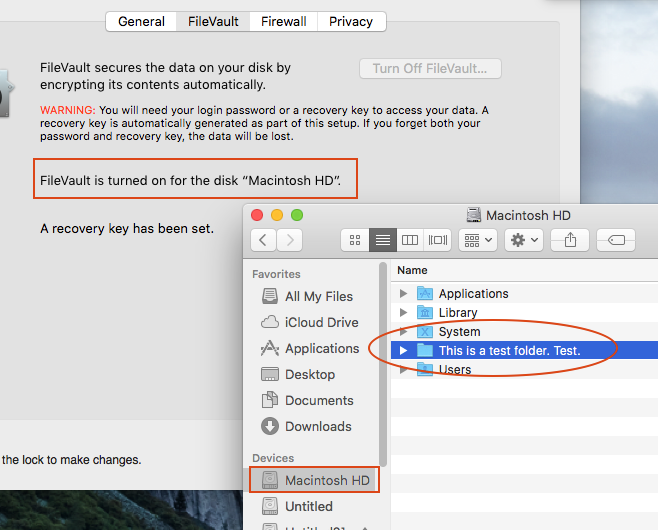
And that’s all there is to this plugin! It simply outputs the VMK and the address at which it was found. In the case of the below screenshot, the memory image is from a VM which has its system volume encrypted, as well as a small 1GB encrypted volume for testing, so both VMK’s are recovered (Though identifying which key matches which volume is left up to you):

We can verify that the VMK is correctly extracted by attaching the disk to a Linux VM and using libfvde – an open-source implementation of FileVault 2 – to unlock the volume using the key:
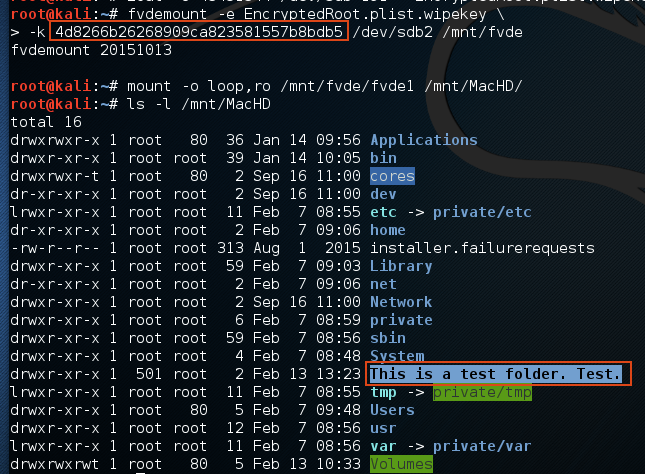
(Note that there is some pre-work required to obtain the EncryptedRoot.plist.wipekey, but this is fully documented in the libfvde documentation).
As with everything though there are, of course, pros and cons – For example, the pros are that it’s simple, fast and (from my testing) somewhat reliable – But the downside is that really it’s not a very sexy method of finding the VMK.
I have tested this using OS X 10.8, 10.9 and 10.11 Virtual Machines encrypted with FileVault 2, and the code is available at this GitHub repository:
https://github.com/tribalchicken/volatility-filevault2
As usual, any feedback is much appreciated (Especially if you have a better method of locating the VMK). Feel free to contact me with feedback.
Note: I have not yet tested this on 32-bit OS X, but aim to do that in the next few days. Update: It would seem I need to eat my own words as newer versions of OS X are 64-bit only.